
FileZilla Pro can be used to connect with FTP to your WordPress site hosted at Rocket.net.
The process starts by creating a new site entry in FileZilla Pro. Open the FileZilla Site Manager, select New Site, type in a name for the site, and save. On the right-hand side of the FileZilla Site Manager is where you'll add your FTP login details.
FTP Login details can be found in the Rocket Mission Control Dashboard. Locate the FTP Address shown there and type it into the Host form in FileZilla Site Manager.
Next, add the FTP account login Username and Password details and click OK.
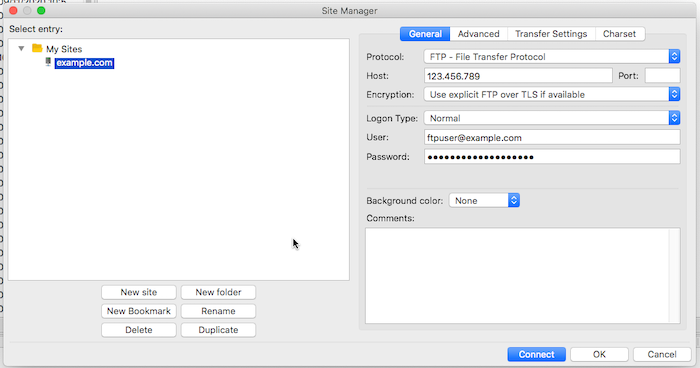
Open the FileZilla Site Manager again. Select the site you just added and click on Connect. On your first login to FTP, you'll note an alert about the certificate of the server. Select "Always trust this certificate in future sessions" and then click, OK. You will then be able to log into the root directory of your Website's file system.
If you have any issues or require assistance, please do not hesitate to Submit a Ticket to our Support Team.
Comments
0 comments
Article is closed for comments.